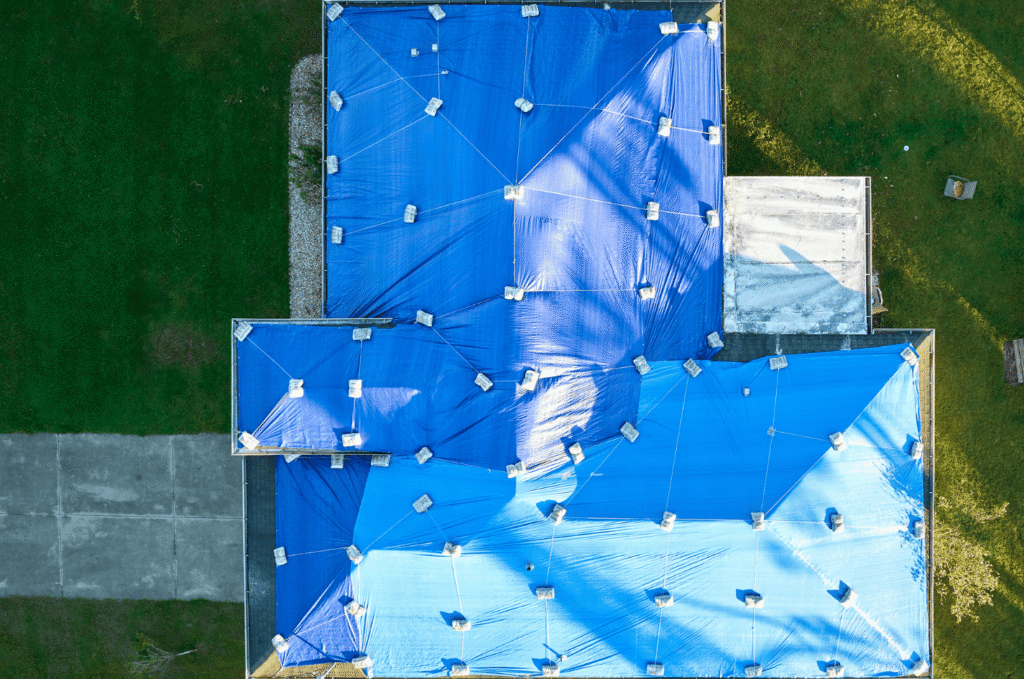
How to Cover Roof with Tarp After Storm: Repair Water Damage
To tarp a roof after a storm, you need to secure a heavy-duty polyethylene tarp over the damaged area by…

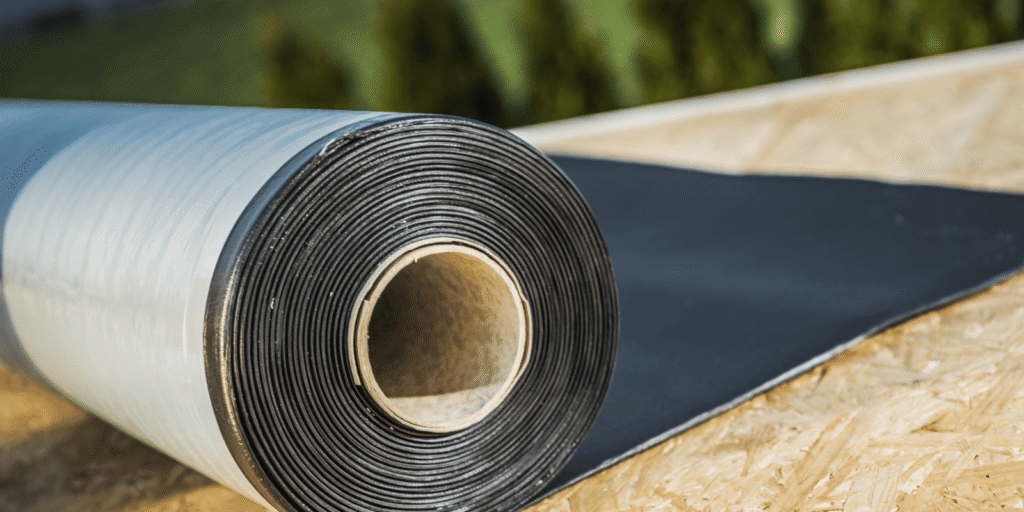
The underlayment of roof systems is installed by rolling out sheets of protective material across the roof deck, overlapping each row by 2-4 inches, and fastening with staples, nails, or cap fasteners before shingles are applied. This critical layer sits between the roof deck and the visible roofing materials, providing secondary water protection. Every quality roof installation includes proper underlayment because this overall roof underlayment barrier prevents moisture from reaching the wood deck and interior spaces below.
This guide explains how contractors install roof underlayment, the different types available, why this layer matters for your roof’s performance, and what to expect during roof replacement or new roof install projects. Understanding underlayment helps you appreciate why roofing services Boston contractors consider this component essential for long-lasting protection.
Roof underlayment is a water-resistant or waterproof barrier material installed directly on top of the roof deck and beneath the primary roofing materials like shingles, tiles, or metal panels. The underlayment of roof systems serves as your home’s secondary line of defense against moisture, protecting the roof deck and interior even when the outer roofing layer is compromised by damage, age, or extreme weather conditions.
Key functions of roof underlayment:
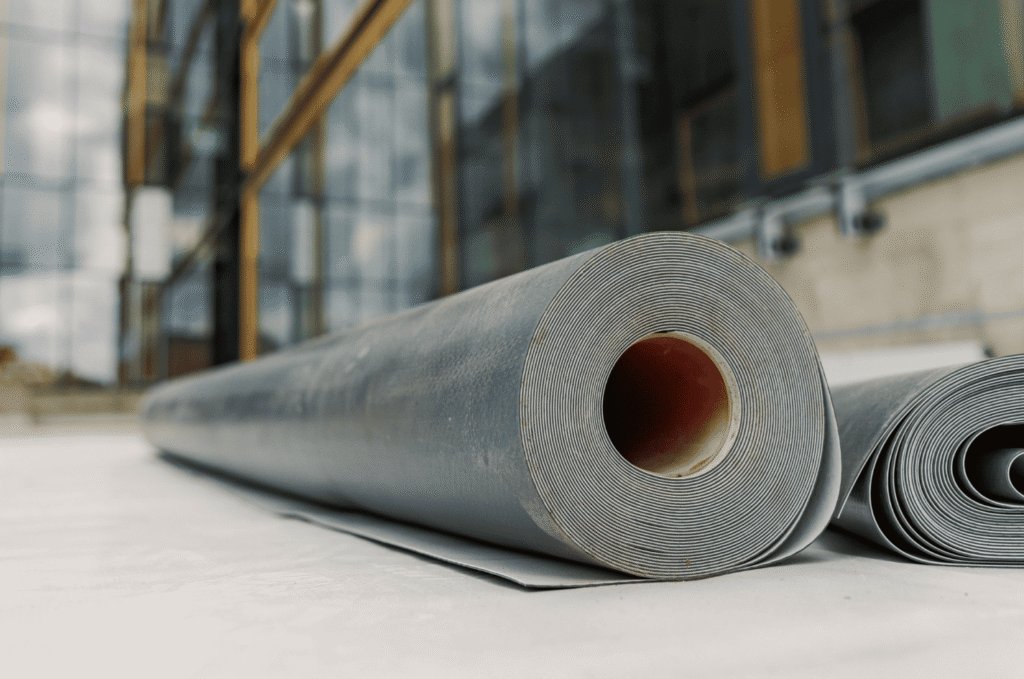
The three main types of roof underlayment available are asphalt-saturated felt, synthetic underlayment, and self-adhering ice and water shield, with each offering different levels of protection, durability, and cost. Choosing the right overall roof replacement of underlayment depends on your climate, roofing material, budget, and local building codes.
Traditional felt underlayment has been used for over a century and remains a budget-friendly option for many roofing applications.
Synthetic underlayment is made from polypropylene or polyethylene and has largely replaced felt in professional roof installation due to superior performance.
Ice and water shield is a rubberized asphalt membrane that sticks directly to the deck and seals around nail penetrations for complete waterproofing.
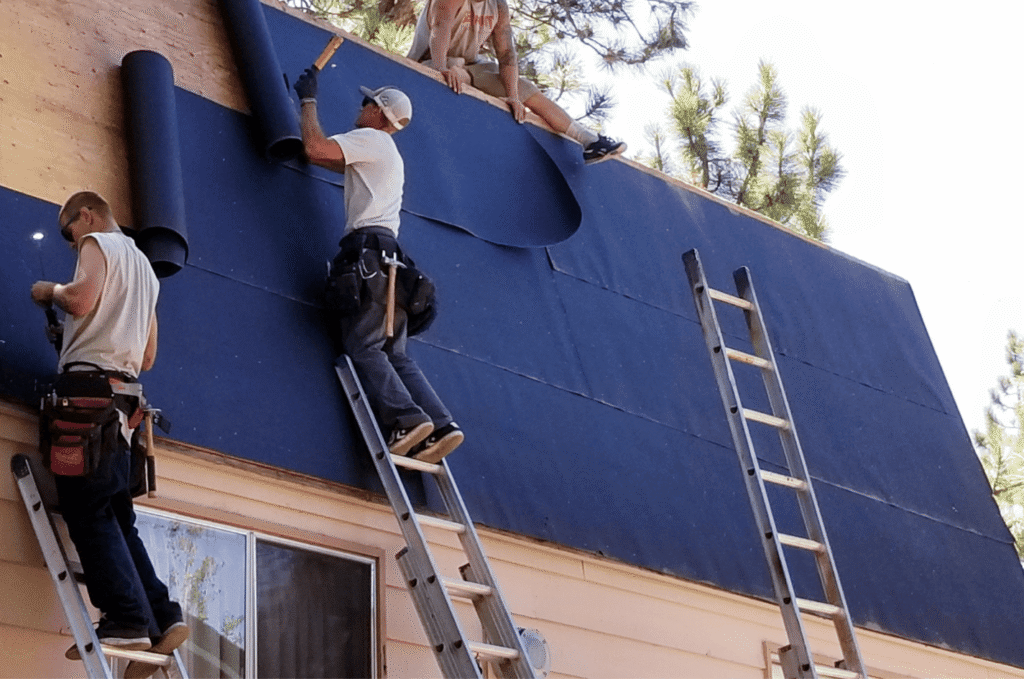
You install roof underlayment by starting at the lowest edge of the roof, rolling out horizontal rows parallel to the eaves, overlapping each subsequent row by 2-4 inches, and fastening securely with cap nails or staples. Proper technique when you install roof underlayment ensures complete coverage with no gaps that could allow water penetration.
Step-by-step installation process:
Proper underlayment installation matters because incorrectly installed underlayment creates gaps and weak points that allow water to reach your roof deck, causing rot, mold, and interior damage even when shingles appear intact. The underlayment of roof systems is only effective when installed with correct overlaps, secure fastening, and proper integration with flashing components.
Consequences of improper installation:
Common underlayment installation mistakes include insufficient overlap between rows, improper fastening that allows wind uplift, installing in the wrong direction, skipping ice and water shield in required areas, and leaving wrinkles or bubbles that prevent shingles from lying flat. Professional roof inspection can identify these issues before they cause problems.
Mistakes to avoid:
Boston’s climate creates specific underlayment requirements that roofing services Boston contractors must address for proper protection. Understanding these local factors ensures your new roof install provides reliable performance.
Valley and Penetration Protection: Boston’s approximately 48 inches of annual snowfall creates significant water volume during spring melts. Valleys concentrate this water flow, making ice and water shield essential in these high-risk areas. Similarly, penetrations around chimneys, vents, and skylights require self-adhering membrane to prevent leaks. Professional roof replacement always includes enhanced underlayment in these critical zones.
Synthetic Underlayment Advantages: Boston’s variable weather, with rapid temperature swings and sudden storms, makes synthetic underlayment preferable to traditional felt. Synthetic products resist tearing from foot traffic during installation, remain stable in heat without wrinkling, and provide better UV resistance if installation pauses due to weather.
OneGuard Roofing ensures every roof installation includes properly installed underlayment that provides lasting protection. Our experienced crews follow manufacturer specifications and exceed code requirements for overall roof underlayment performance.
We serve Boston, Cambridge, Somerville, Brookline, Newton, Quincy, and all Greater Boston communities with expert roofing services. Trust your roof to professionals who understand every layer matters.
Our underlayment services include:
The underlayment of roof systems provides essential protection that keeps your home dry even when shingles are compromised. Understanding how to install roof underlayment correctly helps you appreciate why this hidden layer is so important for long-term roof performance. Whether you need new roof install or roof replacement, proper underlayment is the foundation of reliable protection.
Contact OneGuard Roofing to schedule your roof inspection and learn how proper underlayment protects your home.