Installing a Chimney Cricket in Lexington: Roof Installation
A chimney cricket is a small, peaked roof structure installed behind your chimney that splits water and snow to both…

Roof flashing is installed by cutting and shaping thin metal pieces to fit around roof penetrations, transitions, and edges, then securing them with fasteners and sealant to create watertight barriers at vulnerable points. Proper roof flashing install requires integrating each piece with surrounding roofing materials so water flows over rather than under the flashing.
This critical component prevents leaks at chimneys, vents, skylights, walls, and valleys where the roof surface is interrupted or changes direction. This guide explains how professional contractors install different roof flashing types, why flashing matters for your roof’s performance, common roof flashing issues that cause leaks, and when storm damage repair or roof restoration may be needed.

Roof flashing is thin, weather-resistant metal material installed at roof joints, transitions, and penetrations to direct water away from vulnerable areas and prevent leaks. Flashing bridges the gaps where different roof surfaces meet, where roofing materials end at walls or edges, and where objects like chimneys and vents penetrate the roof surface. Without proper flashing, water would seep into these openings and damage your home.
Areas requiring roof flashing:
The different roof flashing types include step flashing, continuous flashing, drip edge, valley flashing, vent pipe boots, and chimney flashing systems, with each designed for specific applications and roof installation methods. Understanding these roof flashing types helps you recognize what your roof needs and evaluate contractor work quality.
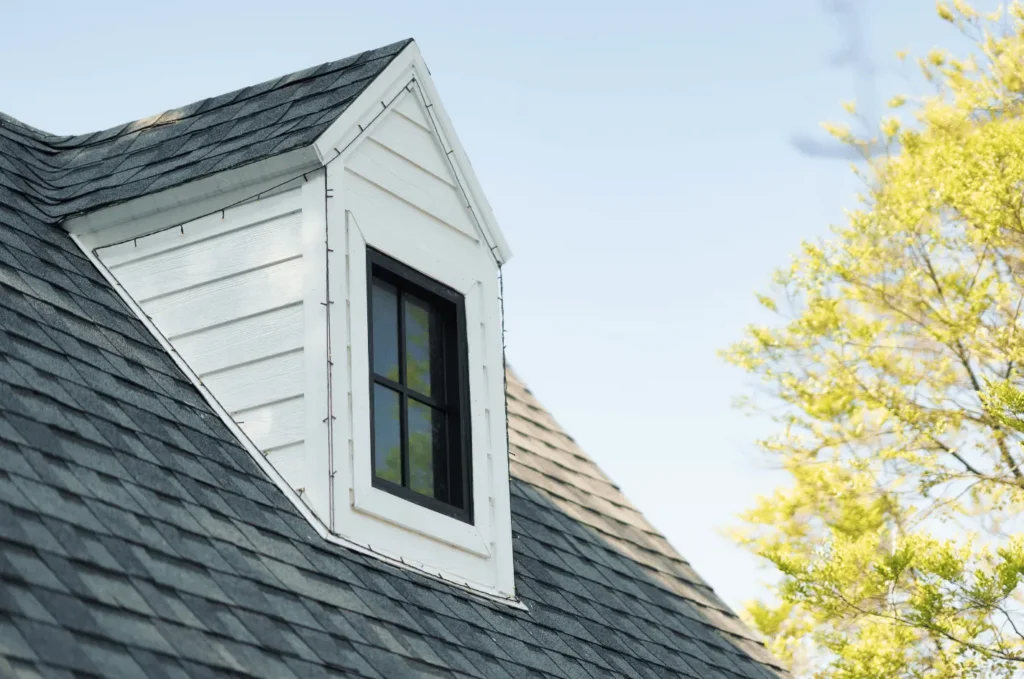
Step flashing consists of L-shaped metal pieces woven between each shingle course where the roof meets a vertical wall. Each piece overlaps the one below, creating a stair-step pattern that channels water onto shingles rather than behind them.
Continuous flashing is a single long piece that runs horizontally where roof meets wall at the bottom, or across the front of a chimney. Unlike step flashing, it spans the entire transition in one piece.
Valley flashing protects the channel where two roof slopes meet. This high-flow area requires robust protection because it concentrates water from large roof areas.
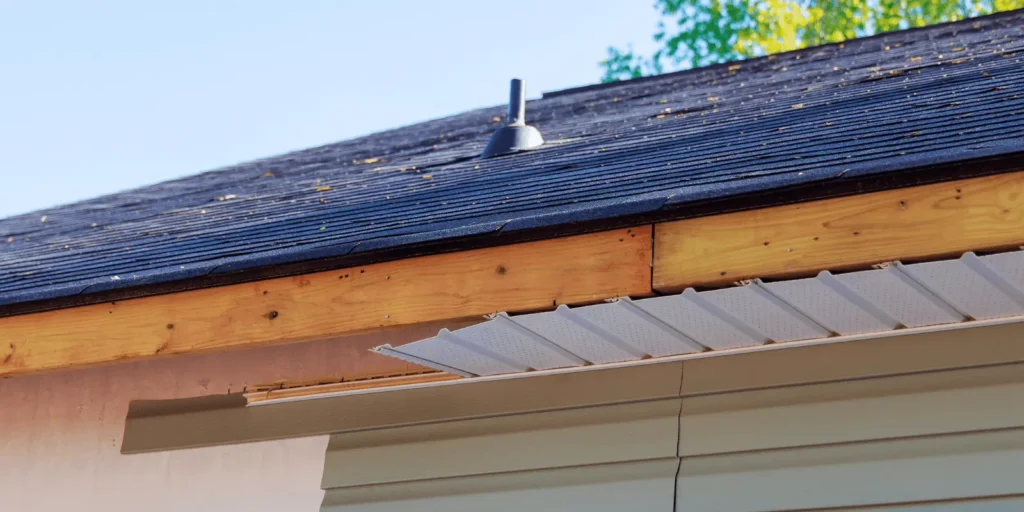
Drip edge is angled metal installed along roof edges to direct water into gutters and protect fascia boards from rot.
Pipe boots are cone-shaped flashing pieces that seal around plumbing vent pipes. The flexible rubber collar seals against the pipe while the metal base integrates with shingles.
Roof flashing is installed by cutting pieces to fit each location, positioning them to overlap in the direction water flows, securing with appropriate fasteners, and sealing joints with roofing cement or caulk. Proper roof flashing install integrates each piece with surrounding materials so no water can reach the deck beneath.
General installation principles:
Common roof flashing issues include separation from adjoining surfaces, corrosion and rust, cracked or dried sealant, improper overlap installation, and physical damage from storms or debris. These roof flashing issues are responsible for a significant percentage of roof leaks and often require professional roof repair Boston contractors to resolve.
Flashing problems that cause leaks:
You repair damaged roof flashing by first identifying the failure point, then either resealing, patching, or completely replacing the affected section depending on the damage extent. Minor roof flashing issues like dried sealant can be fixed with new caulk, while corroded or severely damaged flashing requires complete roof replacement during roof restoration work.
Repair approaches by damage type:
Boston’s challenging climate creates specific demands on roof flashing that roof installation Boston services must address for reliable performance. Understanding local factors helps homeowners appreciate why quality flashing matters.
Wind Damage: Powerful nor’easter storms bring 50-70 mph winds that can lift improperly secured flashing. Storm damage repair often involves replacing flashing torn away during severe weather. Quality roof flashing install includes proper fastening patterns and adequate overlap to resist wind uplift common during Boston’s coastal storms.

OneGuard Roofing ensures every roof installation includes properly installed flashing that prevents leaks at all vulnerable points. Our experienced crews understand that flashing quality directly determines your roof’s long-term performance.
Protect Your Home with Proper Flashing
Roof flashing may be less visible than shingles, but it provides essential protection at the most vulnerable points of your roof. Understanding how different roof flashing types work and recognizing roof flashing issues helps you maintain a leak-free home. Whether you need minor repairs or complete roof replacement, quality flashing installation is essential for lasting protection.
Contact OneGuard Roofing to schedule your roof inspection and have our experts evaluate your flashing condition. Let’s ensure every detail of your roof is properly protected.